REVIEW · TOKYO
Tokyo: Gameboy Mod Workshop at Akihabara
Book on GetYourGuide →Operated by + Y · Bookable on GetYourGuide
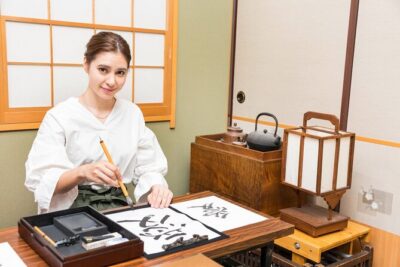
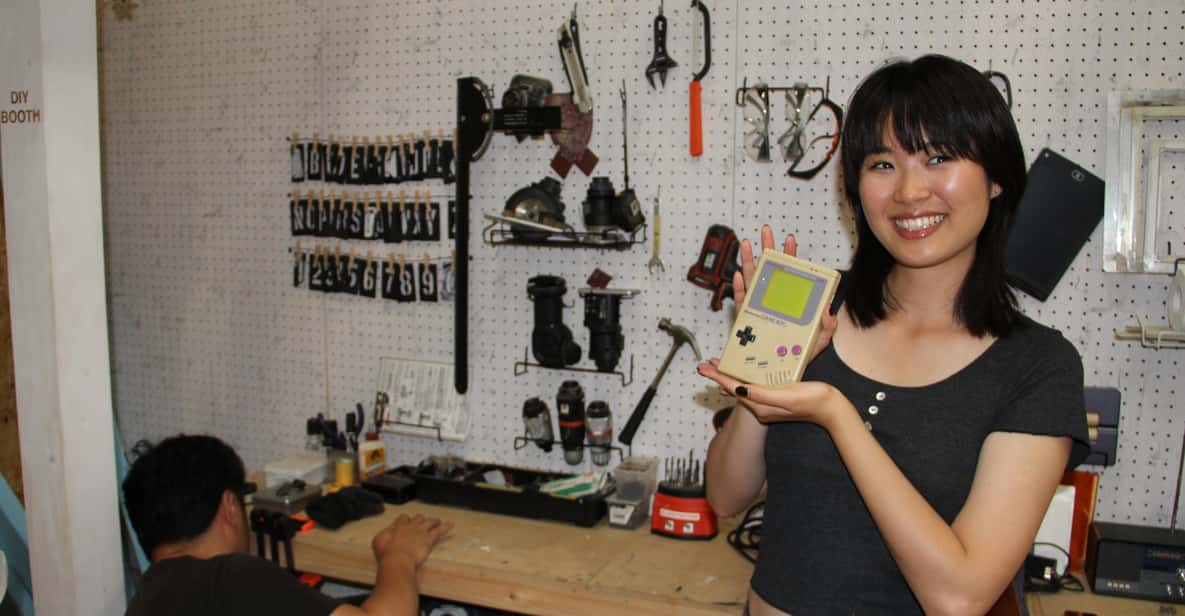
A classic Game Boy feels different when you build it yourself. In Akihabara, you get a 2-hour, small-group workshop where you pick parts, rebuild a DMG-01, and leave with a working handheld you customized. It’s equal parts retro shopping street and real hands-on tech time.
I love the control you get over the details: screen, buttons, and the shell colors. I also like the step-by-step help from the Game Boy masters, with English and Japanese support so you’re not stuck guessing.
One drawback to consider is location and height: the workshop is on the second floor with no elevator or escalator, so plan accordingly if stairs are an issue. Also, at $360, it’s a splurge—worth it if this is your thing, but not the cheapest souvenir in Tokyo.
In This Review
- Key things to know before you go
- Game Boy Mod Workshop in Akihabara: what you’re really buying
- Getting to Wakita Building and meeting the Game Boy masters
- The short history talk that makes the build feel personal
- Pick out your Game Boy parts: DMG-01 choices that change the whole look
- The 2-hour build flow: taking it apart, then putting it back together
- Testing, finishing touches, and taking your Game Boy home
- Retro games on-site: how the shop time fits the workshop
- Price and value: is $360 reasonable for a Tokyo workshop?
- Who this Game Boy workshop suits best
- Should you book this Tokyo Game Boy Mod Workshop?
- FAQ
- Where is the meeting point?
- How long is the Game Boy mod workshop?
- How many people are in a group?
- What Game Boy are you building?
- What languages will you use during the workshop?
- Is it wheelchair accessible?
Key things to know before you go
- DMG-01 starting point: You personalize a classic Game Boy (DMG-01) with provided parts.
- True hands-on build: You take it apart and rebuild it, not just watch.
- Customization choices: Screen, buttons, and color components are part of the fun.
- Small group size: Limited to 4 participants, so you get real attention.
- Retro game add-ons: After building, you can buy games on-site more easily than hunting later.
- Second-floor meeting spot: Wakita Building is reachable, but it’s stairs-only.
Game Boy Mod Workshop in Akihabara: what you’re really buying
This is not a lecture and it’s not a museum stop. You’re paying for a hands-on mod experience that ends with a functioning Game Boy you can actually use back home.
The value hits hardest if you care about how devices work, and if you like making something personal. A standard souvenir is nice, but a personalized handheld is a story you can play.
You’re also in the right place for this. Akihabara already sells nostalgia, but this workshop turns that nostalgia into something physical—something you built with help.
You can also read our reviews of more tours and experiences in Tokyo


Getting to Wakita Building and meeting the Game Boy masters
You’ll meet on the second floor of Wakita Building. Follow the address details you receive and plan to arrive a few minutes early so you can settle in before the build starts.
Because it’s small group and hands-on, timing matters. If you show up late, you’ll shorten your build time and miss some of the explanations that help everything click.
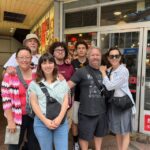
One practical thing: the workshop is led by staff who can work in English and Japanese. In sessions described by previous participants, guides like Ro, Gabi, Franz, and Shio-san show up in the mix—friendly people who keep things moving without rushing you.
And yes, stairs are part of the deal. If you need barrier-free access, this location may not work since there are no elevators or escalators.
The short history talk that makes the build feel personal
Before the screwdriver comes out, you get the context. The workshop covers the Game Boy’s history and influence, and it connects that handheld to the wider world of Nintendo portable consoles.
What makes this worthwhile is that it’s tied to the build you’re about to do. You learn the why behind design choices—why screens mattered, why button layout mattered, and why modding became a fan culture.
You’ll also have chances to ask questions during the session. That two-way conversation is a big reason so many people leave feeling like they got more than a gadget.
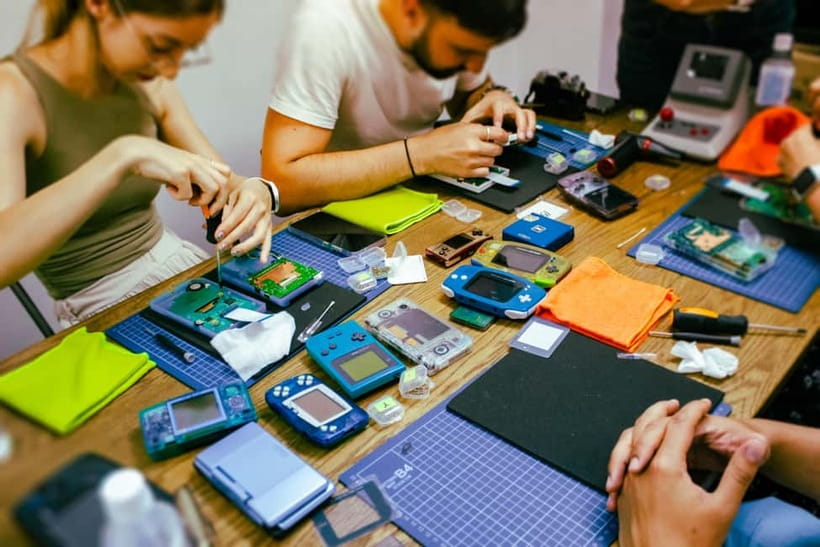
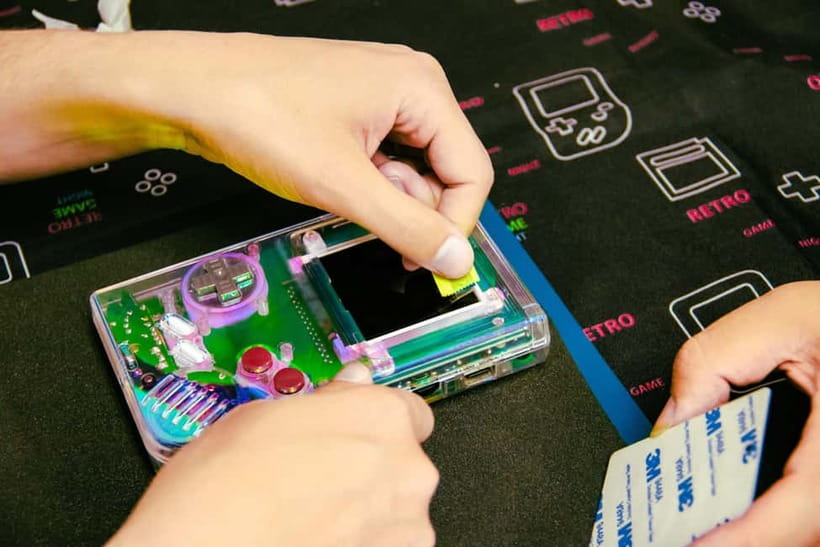
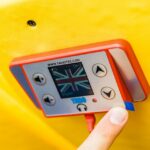
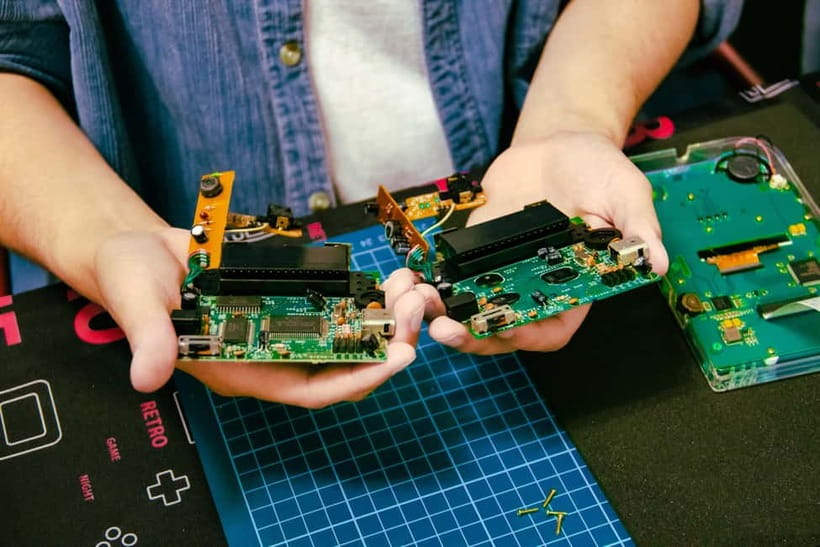
Pick out your Game Boy parts: DMG-01 choices that change the whole look
Your build starts with a vintage DMG-01 base and provided parts. The customization options focus on the parts that you’ll notice every time you play.
Here are the kinds of choices you should expect:
- Screen changes (many participants describe the end result as an improved backlit style screen)
- Buttons and control parts that match your look and feel
- Color decisions for the shell/clamshell and surrounding components
This is more than aesthetic. When you swap in the screen and button set, you’re basically tuning your own handheld to how you want to experience it.
If you’re the type who freezes when you see options, you’ll still be fine. The group is tiny, and the staff helps you narrow down choices while explaining what each selection affects.
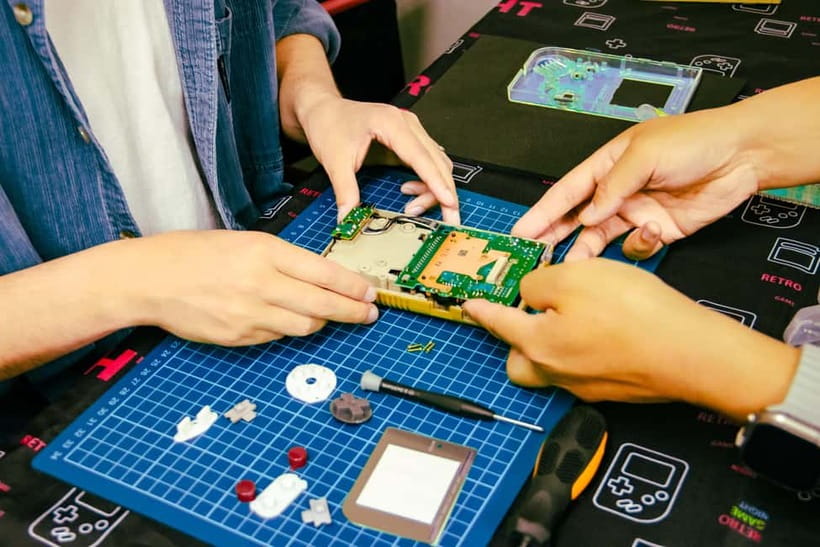
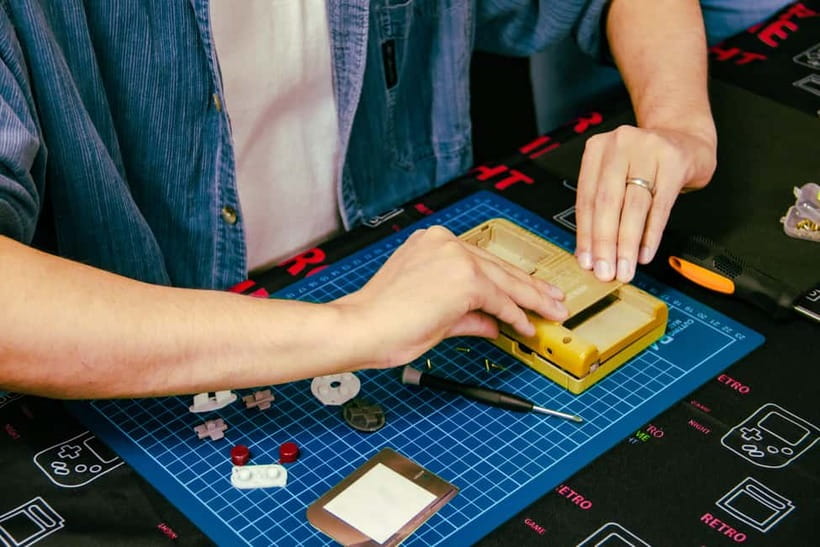
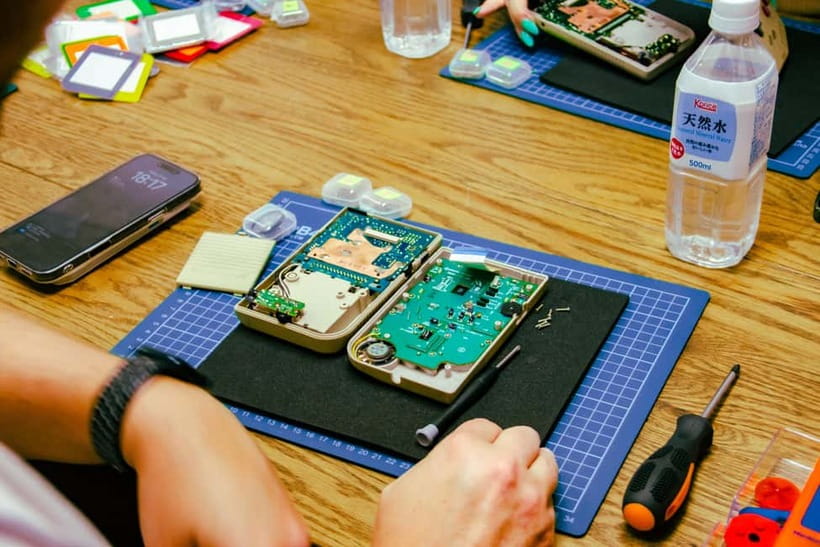
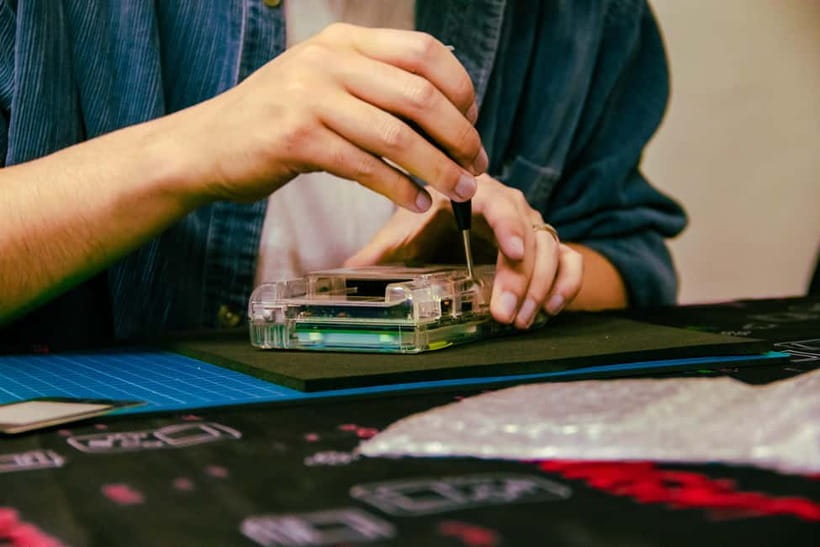
The 2-hour build flow: taking it apart, then putting it back together
The main event is the real build. You disassemble your Game Boy and rebuild it with your selected parts, under guidance.
In a workshop like this, the tricky part is not the tools. The tricky part is timing and confidence: tiny connectors, fragile plastic parts, and steps you don’t want to brute-force.
That’s where the small-group setup helps. With only up to 4 participants, you get quick support if you get stuck. One-on-one help also means you can keep your hands moving instead of waiting for the instructor to cycle back around.
You’ll also learn by doing. Even if you don’t become an electronics expert, you’ll leave understanding what’s where and why it matters. And that makes the handheld feel less like a store-bought item and more like your work.
A lot of people end up treating the build like a nostalgia project: childhood hardware on your table, modern updates going in, and a working result when you’re done.


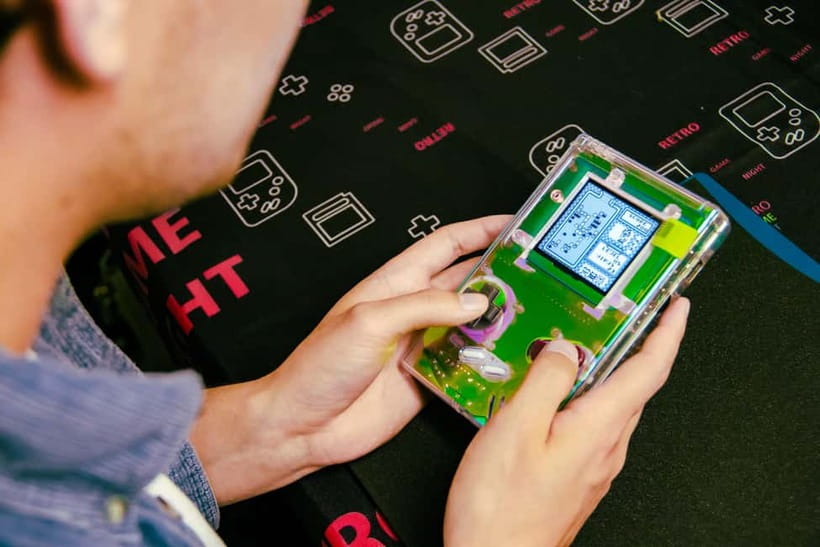
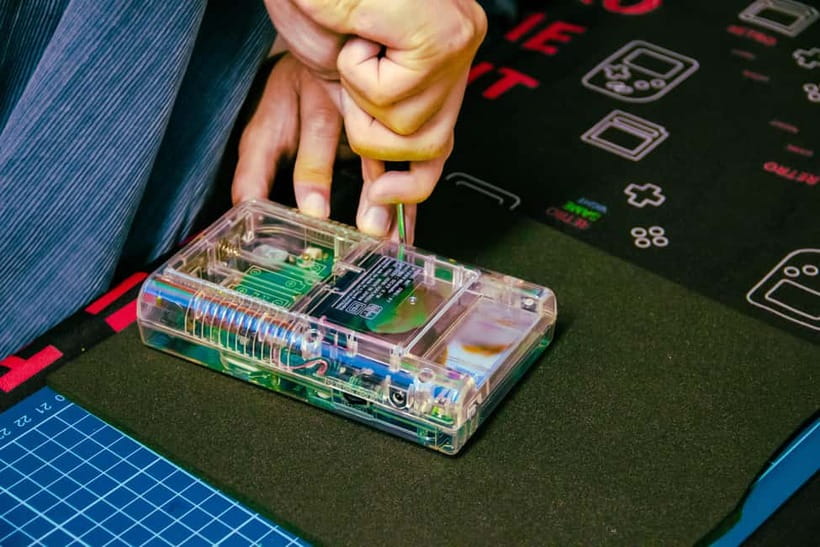
Testing, finishing touches, and taking your Game Boy home
When the assembly finishes, you end up with a fully functioning Game Boy that’s uniquely yours. The point is to leave with something you can play immediately, not a half-finished craft.
Finishing touches can include the overall shell look and the parts you chose. Some participants also mention receiving a case to display and protect the handheld, which is a smart touch for a souvenir you’ll actually keep around.
This is one reason I think the workshop is a better souvenir than most. The Game Boy is both functional and sentimental. You’re not just buying a picture of Akihabara—you’re bringing back an object you’ll use.
Retro games on-site: how the shop time fits the workshop
After building, there’s a chance to choose games from the on-site selection. People mention trying and purchasing classic titles right there, which saves you the hassle of tracking down games across Akihabara the moment you finish.
In reviews, the prices are described as fair compared with other big names in the area, including stores like Super Potato. Even if you don’t buy anything fancy, browsing in the same place you just built your console is a very satisfying loop.
Also, if you’re worried about whether you’ll know what to buy, don’t. The staff can point you toward titles that make sense for the system and what you like.
Price and value: is $360 reasonable for a Tokyo workshop?
$360 sounds steep until you break down what you’re actually getting.
You’re paying for:
- a vintage DMG-01 base and the provided upgrade parts
- hands-on time with trained staff guiding a very technical build
- a small group model, which usually means less staff-to-chair spacing
- the convenience of walking out with a functioning, personalized handheld
- the ability to buy games on-site without extra hunting
There’s also the hidden cost that matters in retro tech: sourcing and maintaining enough working hardware to support multiple builds. One comment I took seriously is that the workshop price ends up feeling fair when you compare it to the practical effort and difficulty of getting the hardware into usable shape for a small class.
If you love gaming history, electronics, or do-it-yourself projects, this is the kind of splurge that feels like an experience, not a purchase.
If you just want a cheap Tokyo souvenir, you might feel the cost. But if you want a build you can play daily, the price stops looking random.
Who this Game Boy workshop suits best
This works especially well if you:
- grew up with Nintendo handhelds and want to recreate that feeling with modern upgrades
- like tech projects and don’t mind taking your time
- want a meaningful keepsake that isn’t stuck as a shelf decoration
- are traveling solo or in a small pair and want an activity where staff attention matters
It’s also a solid choice if you’re traveling with a friend who loves retro gaming. Small groups make it easy to share the experience without the crowding that can happen with bigger tours.
One caution: because the workshop is on the second floor and has no elevator/escalator, it may not be ideal if you need step-free access.
Should you book this Tokyo Game Boy Mod Workshop?
If you want a hands-on, nerdy, practical Tokyo experience with a real end product, this is a strong yes. The small group format, the built-from-scratch process, and the chance to leave with both a customized device and games make it feel like more than a hobby class.
Book it sooner rather than later if you like the idea of the limited spots model. And if stairs are an issue for you, plan an alternative in advance.
Overall: if your heart is in retro gaming and you’re excited to personalize a classic, the $360 price can feel justified. If you’d rather shop than build, you may want to spend your time elsewhere in Akihabara.
FAQ
Where is the meeting point?
The workshop meets on the second floor of Wakita Building. Follow the address instructions provided to find the location.
How long is the Game Boy mod workshop?
The experience lasts 2 hours.
How many people are in a group?
It’s a small group limited to 4 participants.
What Game Boy are you building?
You customize a vintage Game Boy DMG-01 using provided parts, including options like the screen, buttons, and colors.
What languages will you use during the workshop?
The instructor supports English and Japanese.
Is it wheelchair accessible?
It is not wheelchair accessible in the way you might expect. The workshop is on the second floor with no elevators or escalators.